Glow-Up on a Budget: How to Customize Your Jordans for Under $50 and Make Them Truly Yours
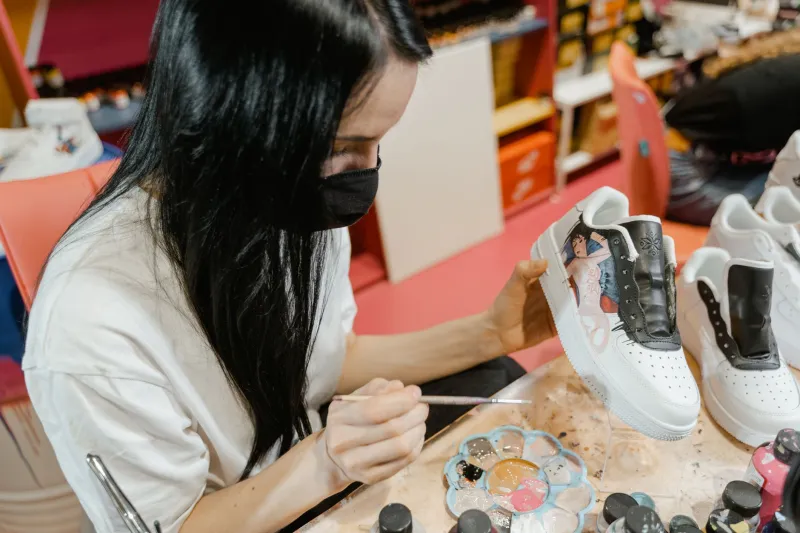
Custom sneakers have always been a flex. The problem is that most people think getting a custom pair means hiring someone with a massive Instagram following and dropping $300 on top of whatever you paid for the shoe. That's one way to do it. But it's not the only way — and honestly, it's not even the most satisfying way.
DIY customization is having a serious moment right now, and the Jordan 18 is one of the best canvases to work with. The silhouette is clean, the panels are defined, and the design language is bold enough that even subtle modifications make a visible impact. Here's a practical, cost-conscious guide to making your pair genuinely your own — without blowing your budget.
Why the Jordan 18 Is a Great Starting Canvas
Before we get into techniques, it's worth talking about why the 18 works so well for customization. The shoe features distinct upper panels separated by visible stitching lines, a prominent midsole, and a relatively simple color structure in most colorways. That geometry makes it easy to isolate areas for modification without the work bleeding into places you didn't intend.
Compare that to something like a Jordan 1, where the overlapping panels and complex construction make clean custom work significantly harder for beginners. The 18 is forgiving. Mistakes are easier to correct, and the visual payoff for even minor changes is high.
Technique 1: Lacing Upgrades — The Underrated Instant Win
Cost: $5 to $15
This is the most slept-on customization move in the game. Swapping out factory laces for premium or novelty alternatives takes about ten minutes and immediately changes the visual profile of the shoe.
For the Jordan 18, flat waxed laces in contrasting colors are the most popular choice right now. A white 18 with black waxed laces reads completely different than the same shoe with standard white laces — more intentional, more elevated. Rope laces in complementary tones add texture and a streetwear edge. Colored laces in bold hues (electric blue, safety orange, deep burgundy) can tie the shoe into an outfit in ways the factory lacing never could.
Brands like Rope Lace Supply, Ropelaces.com, and even Amazon carry quality options in the right lengths for Jordan 18s (typically 45 to 54 inches depending on your lacing style). Budget $8 to $12 for a solid pair and you've already changed the shoe's entire energy.
Pro tip: Experiment with lacing patterns before you commit to new laces. A display lace (straight across the top without threading through the tongue) or a modified straight bar lace can change the look even before you spend a dollar.
Technique 2: Panel Repainting — Where the Real Transformation Happens
Cost: $15 to $30 for supplies
This is where people get nervous, but it shouldn't be intimidating. Repainting small panels on a leather or synthetic leather sneaker is genuinely achievable at home with the right preparation and the right paint.
What you need:
- Angelus Leather Paint (the gold standard for sneaker customization — available on Amazon or angelusdirect.com)
- Acetone or Angelus Leather Preparer & Deglazer
- Fine-tip brushes (a set of 3 to 5 sizes)
- Masking tape
- Angelus Acrylic Finisher (matte or gloss depending on your preference)
Total supply cost: roughly $20 to $30 for a starter kit that covers multiple projects.
The process:
- Clean the panel you're painting thoroughly with the deglazer. This removes the factory finish and allows paint to bond properly. Skipping this step is the number one reason DIY paint jobs crack and peel.
- Apply masking tape to the edges of the panel you're working on. Be precise — this is what separates clean work from sloppy work.
- Apply thin coats of Angelus paint, letting each layer dry fully before adding the next. Two to three thin coats will always look better than one thick coat.
- Seal with Acrylic Finisher once the color layers are fully dry.
For a Jordan 18, popular modifications include repainting the pull tab in a contrasting color, changing the toe cap panel, or adding a pop of color to the heel medallion area. Even a single panel changed in a complementary or contrasting hue shifts the whole shoe's personality.
Before and after reality check: A white Jordan 18 with standard laces and factory finish looks like a clean but standard retro. The same shoe with waxed rope laces and a repainted pull tab in a deep red or forest green? That's a shoe people stop and ask about.
Technique 3: Sole Customization — Making the Bottom Half Count
Cost: $10 to $20
Midsole and outsole customization gets overlooked because most people think about shoes from the upper down. But the sole of the Jordan 18 is a significant design element — the visible midsole is thick, clean, and takes color well.
Midsole painting follows the same process as panel repainting — deglazer, Angelus paint, finisher. The midsole rubber requires slightly more prep and benefits from Angelus 2-Hard Hardener mixed into the paint to increase flexibility and durability. This prevents cracking as the sole flexes with wear.
Sole swaps are a more advanced option, but for the Jordan 18, replacement translucent or icy blue outsoles are available through custom sneaker parts suppliers online. Swapping the sole requires some adhesive work (Barge cement is the go-to) and a bit of patience, but the visual impact is significant — especially on darker colorways where an icy sole creates strong contrast.
For most people starting out, simply repainting the midsole in a clean white or a complementary color is enough to make the shoe look more intentional and well-maintained.
Technique 4: Protective Finishing — Because Protecting Your Work Matters
Cost: Already included in your paint supplies
Once you've made your modifications, protecting them is non-negotiable. Angelus Acrylic Finisher comes in matte, satin, and gloss options. Matte finish is the most popular for a premium, understated look. Gloss reads as more vibrant but can look overdone on some colorways.
Apply two coats of finisher over any painted areas and let cure fully before wearing. This dramatically extends the life of your work and keeps edges from chipping.
The Full Cost Breakdown
| Modification | Estimated Cost |
|---|---|
| Premium laces | $8–$15 |
| Angelus paint kit | $15–$25 |
| Brushes and tape | $5–$8 |
| Sole hardener (optional) | $5–$8 |
| Total | $33–$56 |
You can absolutely stay under $50 by being selective — laces plus one panel repaint is achievable for $25 to $35 total. The full treatment lands closer to $50, but the per-project cost drops significantly once you have the supplies on hand.
The Bigger Point
Customization isn't just about aesthetics — it's about ownership. When you put work into a pair, the connection you have with those shoes changes. They're not just something you bought; they're something you made. And in a sneaker culture that increasingly rewards individuality over conformity, a thoughtfully customized budget pair will always outperform a stock expensive pair in terms of personality.
The Jordan 18 gives you the canvas. Fifty dollars gives you the tools. What you do with it is entirely up to you.